










 About us
 Magazine
 Contact











Table of Contents
- Why a solar system for motorhomes makes sense
- Autonomy in the motorhome: Calculating and planning power requirements
- Monocrystalline, polycrystalline or CIS: Which modules are right for you
- Flexible solar modules for motorhomes in test and comparison
- Motorhome solar system 1000 watts: Sizing for higher output
- MPPT charge controllers, battery management systems and storage
- Installation, weight and winter performance: Practical aspects
- Common mistakes during planning and installation
- Frequently asked questions
Last updated: October 3, 2026
Why a solar system for motorhomes makes sense
A motorhome solar system makes your vehicle independent of shore power and enables true off-grid camping. With a well-dimensioned photovoltaic system, you can park anywhere instead of relying on campsites with power hookups.
A motorhome solar system generates electricity during the day while you are on the road or relaxing at your parking spot. This power charges your leisure battery and supplies the refrigerator, lighting, and water pump - no diesel generator, no noise, no additional costs.
At Campidoo, we support campers in selecting the right solar system. Proper planning saves you hassle and money later on.
Autonomy in the motorhome: Calculating and planning power requirements
Before you buy a motorhome solar system, you must know how much electricity you need daily. This is the foundation for all further decisions.
Add up the consumption of all devices: LED lighting (2-5 A/h), 12V refrigerator (3-8 A/h), water pump (10-15 A per use), laptop/phone charging (5-10 A/h), and heating/fan (5-20 A/h).
A typical motorhome uses 50-100 ampere-hours per day. Multiply this value by 1.3 - this is your buffer for cloudy days and battery aging. A motorhome with an 80 Ah daily requirement should therefore have a solar system that generates at least 100-120 Ah per day under good conditions.
Monocrystalline, polycrystalline or CIS: Which modules are right for you
The type of solar cell determines efficiency, price, and behavior in low light.
Monocrystalline modules have the highest efficiency (18-22%) and require less space. They are more expensive but ideal for small roofs or high power requirements. They still work relatively well under cloudy skies.
Polycrystalline modules cost less and have a slightly lower efficiency (15-18%). They require more space for the same output but are more robust against extreme temperatures.
CIS modules (Copper Indium Diselenide) are rare and expensive, but have excellent behavior in diffuse light and high temperatures. Efficiency is around 13-16%, but performance drops less in heat compared to silicon.
For most motorhome owners, monocrystalline is the best choice: good efficiency, robust design, good price-performance ratio.
Flexible solar modules for motorhomes in test and comparison
Rigid modules are standard. They are cheaper, more durable (25+ years), and have better efficiency. Installation is simple with aluminum frames and adhesive sealant.
Flexible modules weigh 60-70% less and can be glued to plastic roofs. They last 10-15 years, after which their performance decreases. Efficiency is slightly lower. Flexible modules only make sense if weight is critical or the roof is not flat enough for rigid modules.
Motorhome solar system 1000 watts: Sizing for higher output
A 1000-watt motorhome solar system refers to 1000 watts of rated power under ideal conditions. In practice, it produces 700-800 watts in summer and 200-300 watts in winter – about 120-150 ampere-hours per day in summer in a 12V on-board network.
How to size correctly:
- 500 watts: small motorhomes, light use, summer
- 750 watts: medium motorhomes, normal use
- 1000 watts: large motorhomes, high consumption or winter use
- 1500+ watts: high-tech vehicles, air conditioning, frequent cloudy days
Calculate your real requirements instead of scaling up blindly – more watts mean more weight and higher roof load.
MPPT charge controllers, battery management systems and storage
The solar controller (MPPT or PWM) converts the solar voltage into the correct charging voltage for your battery. MPPT charge controllers are more expensive but 20-30% more efficient than PWM. For systems over 400 watts, MPPT is worth it.
Charge controller types and selection
PWM controller (Pulse Width Modulation):
- Cheaper (80-200 euros), 70-80% efficiency
- Suitable for small systems (up to 400 watts) and 12V systems
- Disadvantage: At high solar voltage, much energy is wasted as heat
MPPT controller (Maximum Power Point Tracking):
- More expensive (200-600 euros), 95%+ efficiency
- Suitable for systems over 400 watts and 24V systems
- Can use higher solar voltages and convert them to lower battery voltages
- Example: An MPPT controller can reduce 60V from solar modules to 12V for the battery, delivering 25% more energy than a PWM controller
Rule of thumb: For systems under 400 watts, PWM is sufficient. For 500-1500 watts, MPPT is economical. For over 1500 watts, MPPT is mandatory.
Battery technologies: LiFePO4 vs. AGM vs. Gel
The battery stores solar energy during the day and powers your vehicle at night.
LiFePO4 batteries (Lithium Iron Phosphate):
- Cycle life: 3000-5000 cycles (10-15 years lifespan)
- Discharge current: Up to 100% (you can drain the battery completely)
- Weight: 60-70% lighter than lead
- Built-in BMS protects against overcharging and deep discharge
- Cost: 1500-3000 euros for 100 Ah
- Ideal for: Year-round camping, high power consumption, weight issues
AGM batteries (Absorbent Glass Mat):
- Cycle life: 500-1000 cycles (3-5 years lifespan)
- Discharge current: Maximum 50% (deep discharge quickly destroys the battery)
- Maintenance-free, robust against vibrations
- Cost: 400-800 euros for 100 Ah
- Ideal for: Occasional campers, small systems, small budget
Gel batteries:
- Similar to AGM, but with gel electrolyte
- Cycle life: 500-1000 cycles
- Discharge current: Maximum 50%
- Cost: 500-1000 euros for 100 Ah
- Ideal for: Vehicles with vibrations, longer storage periods
10-year comparison: LiFePO4 (2000 euro initial cost + 100 euro maintenance) is cheaper in the long run than AGM (600 euros × 3 batteries + 200 euro maintenance), as one LiFePO4 battery lasts 10 years.
Battery Management System (BMS)
The BMS protects your battery from deep discharge, overcharging, and short circuits. LiFePO4 batteries have an integrated BMS. For lead-acid batteries, you can install an external BMS (100-300 euros) between the charge controller and the battery.
Integration into existing on-board electronics: Step-by-step guide
Those who already have a battery and charge controller can often retrofit the solar system.
Steps 1-3: Inventory and compatibility check What battery do you have? Which charge controller is installed? If you have a LiFePO4 battery and a PWM controller, you must upgrade to an MPPT controller with a LiFePO4 profile.
Steps 4-5: Disconnect old components and connect new solar modules Disconnect the battery negative terminal, turn off all consumers, disconnect the charge controller from the power grid. Mount solar modules on the roof, lay cables (cross-section: at least 6 mm² for 400 watts), install a fuse, connect the charge controller to the battery (cross-section: at least 16 mm² for 400 watts).
Steps 6-7: Configure and test charge controller Set battery type (AGM, Gel, or LiFePO4), set charging voltage, set cutoff voltage. In sunshine, the charge controller should show current; at night, it should not allow reverse current.
Common integration problems:
-
Charge controller and battery not matched: A PWM controller with LiFePO4 does not work correctly. LiFePO4 needs an MPPT controller with balancing function.
-
Cable cross-sections too small: If you have an old PWM controller with 4 mm² cables and are now connecting 1000-watt solar modules, you must upgrade the cables to 10 mm².
-
No fuse between module and controller: A short circuit can cause a fire. Always install a fuse (10-20 A).
-
Old battery overloaded by new solar system: Limit the charging current in the controller to a maximum of 100 A (or 1 C = capacity per hour).
Installation, weight and winter performance: Practical aspects
Roof mounting is critical. Done incorrectly, it will cost you warranty, safety, and possibly vehicle registration compliance.
Weight calculation and roof load check
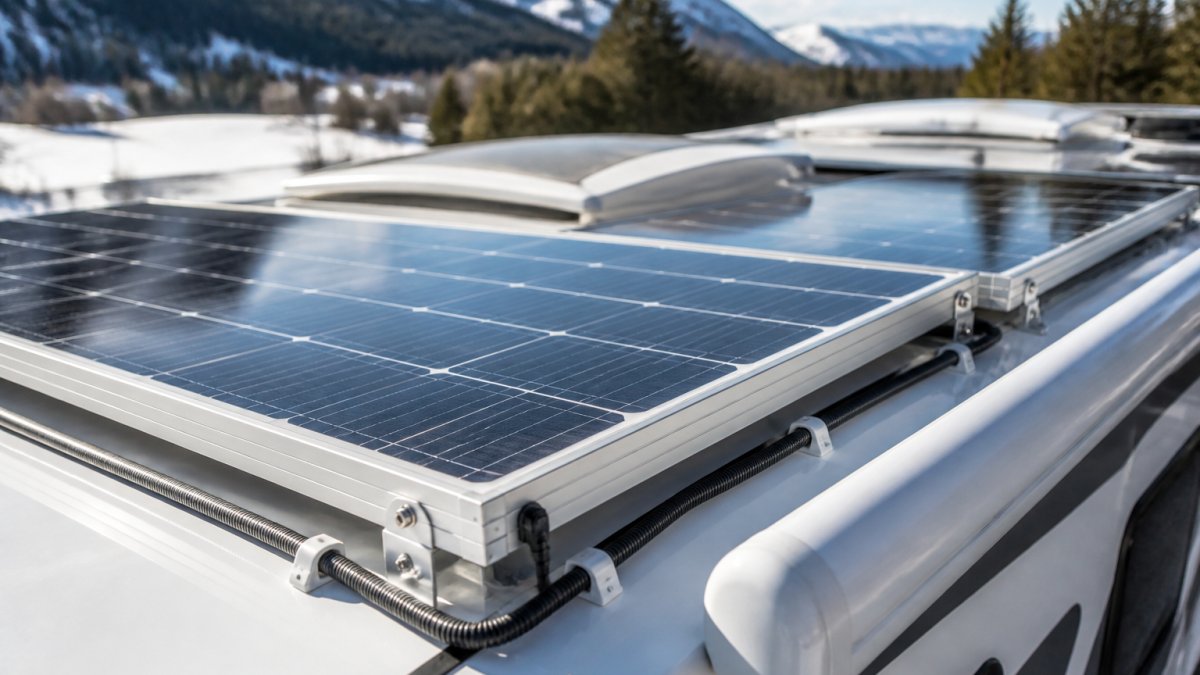
A rigid 400-watt module weighs about 20 kg. With aluminum frame, mounting material, and cabling, you reach 26-30 kg per module. A typical 1000-watt system weighs 50-90 kg.
The permissible roof load can be found in the vehicle papers or the manual. Many manufacturers specify the maximum roof load in kg/m² – typical values are 50-75 kg/m² for fiberglass roofs, up to 100 kg/m² for aluminum roofs.
Practical checklist:
- Weigh the current total mass of the vehicle or read it from the registration certificate
- Check permissible total mass
- Calculate residual weight: permissible minus current
- Add up all roof accessories (air conditioning, antenna, roof rack, awning)
- Calculate remaining capacity for solar modules
Those who exceed the load limit risk fines and loss of insurance coverage in the event of an accident.
Legal aspects: TÜV and registration requirements
Permanent solar systems on the roof are structural modifications.
Vehicles up to 3.5 tons (Class B):
- Permanent solar modules are considered an attachment
- Registration with TÜV is required if the total mass or axle load is changed
- Flexible modules may be treated as wear-and-tear repairs under certain circumstances
Vehicles over 3.5 tons (Class C):
- Permanent solar systems must be registered with TÜV before commissioning
- A main inspection with formal approval is required
- Cost: 150-300 euros for registration
Check insurance: Inform your comprehensive insurance company before installation. Without notification, the insurer may reject damage claims.
Practical procedure:
- Plan the solar system and calculate the weight
- Before installation: Contact TÜV
- After installation: Arrange an inspection appointment
- Receive registration and have it entered into vehicle papers
- Inform insurance
- Roof installation: Material and fastening
Roof installation: Material and fastening
Rigid modules with aluminum frame (Standard):
- The frame is fastened with stainless steel screws and sealant
- Use only sealant suitable for your roof material: polyurethane for fiberglass, silicone for plastic, acrylic for aluminum
- Incorrect sealant leads to leaks and water damage
- Installation costs: 400-800 euros from specialized companies
Flexible modules (glued):
- Lighter (60-70% less weight), but less durable (10-15 years instead of 25+ years)
- Adhesive must be suitable for plastic roofs
- Advantage: No screws, no roof penetrations, often no TÜV registration required
- Disadvantage: More difficult to repair, efficiency 5-10% lower
Winter performance and orientation
In December and January, the same system generates only 30-50% of its summer output. Snow blocks the modules completely.
Optimize alignment:
- South-facing is ideal
- East-West orientation yields 15-20% less output
- Flat roofs should have modules tilted at 30-45°
- Flat alignment (0-10°) reduces output by 10-15%, but saves weight
Winter tips:
- Mount modules so that snow slides off easily (at least 20° tilt)
- Plan for 40% of rated capacity in winter
- A backup generator (2-3 kW) is useful for year-round campers
- Double battery capacity in winter: If you need 80 Ah daily, you should have 160 Ah of storage
Common mistakes in planning and installation
Mistake 1: Buying a battery that is too small. Many campers try to save money on storage and buy a 100 Ah battery. This will destroy lead-acid batteries in one season. Rule: Battery capacity should be at least 2x the daily consumption.
Mistake 2: Incorrect cable cross-sections. Cables that are too thin lead to high voltage drop. A 400-watt system needs at least 6 mm² copper cable from the module to the controller, and 16 mm² from the controller to the battery.
Mistake 3: No fuse. Every line between the module, controller, and battery needs a fuse. A short circuit can lead to a fire.
Mistake 4: Charge controller and battery not matched. A PWM controller with LiFePO4 does not work correctly. LiFePO4 requires an MPPT controller.
Mistake 5: Mounting modules too close together. Shade from one module onto another reduces total output massively. Maintain at least 20 cm distance between modules.
At Campidoo, you will find high-quality components and accessories to avoid these mistakes.
A well-planned motorhome solar system gives you true freedom: You can stay wherever you want and have power when you need it. The investment pays off - not just in saved camping fees, but in more flexibility and less dependency. Start with an honest calculation of your power needs, choose the right module size and battery capacity, and have the installation done by a professional. With the right components and expert advice, you will quickly experience the benefits of self-sufficient camping - and can enjoy your adventures in the most beautiful places.
Frequently Asked Questions
How many watts should a solar system for a motorhome be at a minimum?
That depends on your power consumption. For occasional campers with low consumption, 100-200 watts-peak is often enough. Anyone wanting to stand self-sufficiently for several days while using a fridge, heater, or water pump should calculate for 300-500 watts. For higher demands, 1000 watts or more makes sense. First, calculate your daily power consumption to choose the right output.
What is the difference between monocrystalline and flexible solar modules?
Monocrystalline modules have higher efficiency (18-22%), but require more space and are rigid. Flexible modules are lighter, adapt to the roof, and are easier to install, but have slightly lower efficiency (15-18%). For limited roof space, monocrystalline modules are more efficient; for uneven roofs or weight constraints, flexible modules are the better choice.
Do I need an MPPT charge controller or is a PWM controller enough?
An MPPT charge controller is significantly more efficient, especially with longer cable runs and in situations with changing light conditions. It uses 15-30% more solar energy than a PWM controller and pays for itself through higher charging reliability and better battery life. PWM controllers are cheaper and sufficient for very small systems, but for 300 watts and up, an MPPT controller is recommended.
Can I really operate my motorhome self-sufficiently with a solar system?
True self-sufficiency depends on your consumption, sunlight exposure, and storage capacity. In summer with moderate consumption, self-sufficiency is often possible. In winter or during bad weather, you must expect storage losses. Realistic expectation: With 500 watts of solar power and 200 Ah of LiFePO4 storage, you can achieve self-sufficiency on sunny days; on cloudy days, you will need a buffer or a generator.