










 About us
 Magazine
 Contact









Table of Contents
- Basics: 12 V and 230 V Power Supply in Caravans
- Retrofitting Shore Power in Caravans: From the CEE Socket to the Onboard Distribution
- 230 V Distribution in Caravans: Cables, Wire Cross-Sections and Circuit Protection
- Connecting an Inverter in a Caravan: Mains-Priority Switching and Changeover Relays
- Caravan Electrical Wiring Diagram: Options for Different Starting Situations
- Step-by-Step Retrofit: Materials, Tools and Installation Instructions
- Common Mistakes and Troubleshooting
- Legal Requirements and Inspections
- Frequently Asked Questions
Last updated: October 16, 2026
Basics: 12 V and 230 V Power Supply in Caravans
Retrofitting a 230 V power supply is one of the most important improvements you can make to a caravan.
The 12 V system powers the leisure battery and is sufficient for LED lighting and small pumps. The 230 V system requires an external power source: shore power at the campsite or an inverter that converts 12 V direct current into 230 V alternating current.
Without a shore power connection, you will be left in the dark when the battery runs out. With a 230 V power supply, you have true independence.
At Campidoo, you will find all the components for safe electrical installation: from robust power cables to professional circuit breaker modules.
Retrofitting Shore Power in Caravans: From the CEE Socket to the Onboard Distribution
Retrofitting shore power in a caravan means creating a connection from the campsite power supply to the caravan.
The CEE socket is mounted on the outside of the caravan, ideally within reach of the power cable.
The power distribution is the heart of the system: Here, the power is branched off to circuit breakers for the individual circuits—sockets, heating, and refrigerator.
Without proper distribution, overloading a circuit with too many devices can lead to fire.
230 V Distribution in Caravans: Cables, Wire Cross-Sections and Circuit Protection
The 230 V distribution is the nervous system of your electrical system. Done incorrectly, it can be dangerous. Done correctly, everything will work reliably.
Cable Types and Wire Cross-Sections
In a caravan, you need H07RN-F cable: flexible cables with rubber insulation that can withstand vibration and temperature changes.
The wire cross-section makes the difference: A cable that is too thin will overheat, while one that is too thick will be expensive and unwieldy.
General rule:
- 1.5 mm² for small circuits (lights, sockets up to 10 A)
- 2.5 mm² for medium loads (heating, refrigerator)
- 4 mm² or 6 mm² for the main cable from the shore power connection
This is not optional; it is a matter of safety. A cable that is too thin can catch fire.
Fuses and Circuit Breakers
Fuses interrupt the flow of electricity when overloaded. There are two types:
- Melt-wire fuses: Old technology; too much current melts the wire.
- Circuit breakers (MCBs): A modern solution that automatically switches off and can be switched back on—safer and more practical.
Each circuit needs its own breaker. A 16 A breaker for the sockets, a 10 A breaker for the lighting, and a 16 A breaker for the heating.
Residual Current Circuit Breakers (RCDs) and Electrical Safety
The RCD is the most important protection against electric shock: It measures the flow of electricity and immediately switches off if something is wrong—for example, if you touch a socket with a damp finger.
An RCD with a 30 mA tripping current is standard: If 30 milliamperes of current "leak" (for example, through the body), it switches off. Install it before all sockets—this is safer and required by law (VDE 0100).
Connecting an Inverter in a Caravan: Mains-Priority Switching and Changeover Relays
Without shore power, you need an inverter that converts 12 V direct current from the battery into 230 V alternating current.
The inverter is located close to the battery; a thick power cable (at least 4 mm², preferably 6 mm²) leads to the inverter via a switch.
Shore power and the inverter must not run at the same time, or conflicts will occur. This is why you need a mains-priority switching system, a changeover relay that switches automatically.
Here is how it works:
- Shore power connected? The relay uses shore power, and the inverter is switched off.
- Shore power disconnected? The relay switches to the inverter.
The changeover relay is inexpensive but essential. Without it, you have to switch manually, which is impractical and prone to errors.
Caravan Electrical Wiring Diagram: Options for Different Starting Situations
Every caravan is different. An old VW Bus has different requirements than a modern caravan with a dual-battery system.
Option 1: Simple Shore Power Connection
- CEE socket → power distribution → sockets and devices
- Simple, safe, affordable
- Works only with shore power
Option 2: Shore Power + Inverter
- Shore power and inverter with a changeover relay
- The battery is charged by shore power
- The inverter kicks in when shore power is disconnected
- The best solution for flexible campers
Option 3: With a Solar System
- Shore power + inverter + solar panels
- Solar power charges the battery
- Maximum self-sufficiency
- More complex and expensive, but true independence
The wiring diagram depends on your requirements: occasional power—shore power is sufficient; often without power—an inverter is essential; true self-sufficiency—add a solar system.
Step-by-Step Retrofit: Materials, Tools and Installation Instructions
Retrofitting a 230 V power supply in a caravan is feasible, but differs from motorhome or camper conversions in several ways: The bodywork is usually made of sandwich panels with polystyrene or PU cores, the existing 12 V wiring runs in conduits behind the cabinet fronts, and the outer skin may only be penetrated at designated points. Those who know these three peculiarities can plan the retrofit realistically and avoid typical mistakes.
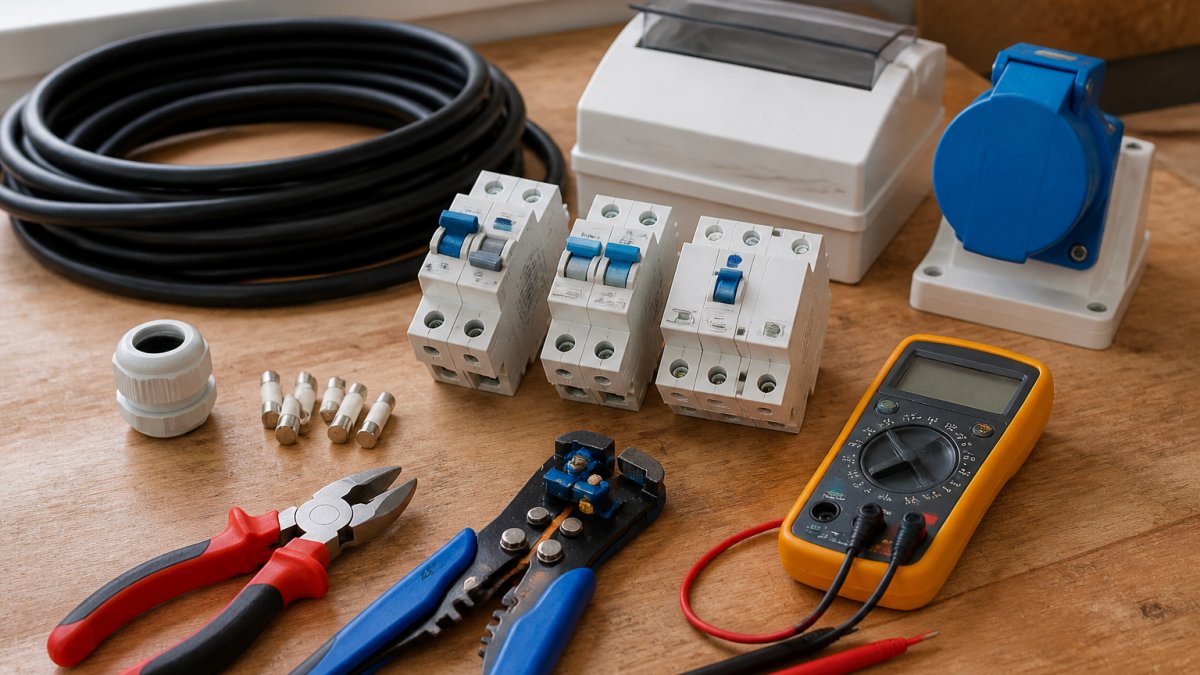
Checklist: Required Materials and Tools
Materials (Estimated Values, Prices for Reference):
- 16 A CEE inlet socket, blue, with hinged cover and seal (approx. 25–60 EUR)
- H07RN-F 3×2.5 mm² shore power cable, length depending on the installation location (approx. 2–4 EUR per meter)
- 2-pole, 30 mA, 40 A residual current circuit breaker (FI/RCD) (approx. 25–50 EUR)
- 1-pole or 2-pole circuit breaker (MCB), 10 A and 16 A (approx. 5–12 EUR each)
Tools:
- Wire stripper and ferrule crimper
- Side cutters and screwdrivers (flathead, Phillips, and Torx if necessary)
- Multimeter with continuity and voltage testing
- Installation tester or at least an RCD tester (30 mA tripping current)
Step 1: Determine the Installation Location and Prepare the External Entry
For the CEE inlet socket, choose a location on the exterior wall that
- is protected from splashing water and rain (below the window sill or behind a flap),
- is accessible from the inside without cutting through a load-bearing cabinet wall,
- and has a short run to the distribution board (general rule: less than 3 meters).
Before drilling, check where cables and pipes run—in many caravans, the 12 V wiring runs in the ceiling or floor area; a look behind the cabinet front or into the technical compartment will reveal the routing.
Thread the shore power cable through the opening before permanently screwing the socket into place. Seal the entry with butyl tape and sealant, not just silicone, which is sensitive to UV rays over time.
Step 2: Set Up the Interior Distribution
Install the distribution board in a technical compartment, under a seat, or in a wardrobe shelf—wherever the cable runs are shortest. Important: The distribution box must remain accessible so that you can reset the circuit breakers and RCD in the event of a fault.
Connection sequence in the distribution board:
- Shore power cable from the CEE socket to the input terminal of the RCD.
- From the RCD output to the busbar of the circuit breakers.
- From each circuit breaker to its own circuit (sockets, heating, refrigerator).
The RCD is always located before all circuit breakers so that it protects all subsequent circuits. The circuit breakers are set separately for each circuit: 16 A for socket circuits, 10 A for lighting, 16 A for heating and refrigerator, depending on the device's rated current.
Step 3: Route Cables and Install Sockets Inside
Route the 230 V cables separately from the 12 V cables, preferably in their own cable duct or conduit—this prevents interference and makes troubleshooting easier.
For wire cross-sections, use the following practical guidelines:
- 1.5 mm² for short socket circuits up to 10 A and for lighting
- 2.5 mm² for socket circuits up to 16 A and for heating/refrigerator
- 2.5 mm² for the supply cable from the CEE socket to the distribution board over short distances, 4 mm² for longer distances or when the supply cable serves several circuits simultaneously
The exact sizing depends on the routing method, grouping, and ambient temperature; if in doubt, have an electrician confirm the wire cross-section. Each socket receives three wires: brown (L), blue (N), and yellow-green (PE). Fit the wires with ferrules and tighten them in the screw terminals—do not solder, as solder joints can fatigue under vibration.
Step 4: Testing and Commissioning
Before switching on for the first time, check the following with the multimeter:
- Continuity between PE and N (should not be continuous, otherwise there is a short circuit)
- Resistance of the protective conductor connection to each socket
- Voltage at the terminals after switching on (approx. 230 V between L and N, approx. 230 V between L and PE)
Then press the test button on the RCD. The breaker must trip immediately. Then switch on the circuit breakers individually and test each circuit with a socket tester or a small appliance.
Cost and Time Estimates
For a simple retrofit with CEE power input, an RCD, two circuit breakers, and two to three interior sockets, material costs are approximately EUR 150–350, plus the initial inspection by a qualified electrician (estimated at EUR 100–250). If you prepare the external feed-through and internal routing yourself, you reduce the electrician's workload. Preparation takes an experienced DIYer about half a day; electrical installation and testing by the electrician take a few hours.
Common Faults and Troubleshooting
Fault 1: Cables that are too thin Symptom: The plug gets hot, and appliances operate poorly.
Fault 3: Power cable not properly insulated Symptom: Electric shock or short circuit.
Fault 4: Incorrect fuse ratings Symptom: The fuse keeps tripping or burning out.
Fault 5: CEE socket not watertight Symptom: Water enters, causing corrosion.
If something is not working, check it with a multimeter. Is there voltage?
Legal Requirements and Inspections
For 230-V installations in caravans in Germany, the general VDE 0100 standard does not apply on its own, but rather DIN VDE 0100-721 ("Low-voltage installations - Part 7-721: Requirements for workplaces, rooms and installations of a special nature - Caravans and motorhomes"). It specifies the general rules for vehicles and includes, among others:
- RCD with a 30 mA tripping current for all socket circuits operated in or on the vehicle.
- Overcurrent protection for each circuit, coordinated with the cable cross-section and installation method.
- Separation of 230-V and 12-V cables and clear labelling.
- Protection against contact and against water ingress at the power input point.
In addition, the general parts of VDE 0100 (DIN VDE 0100-410 for protective measures, DIN VDE 0100-430 for overcurrent protection), as well as VDE 0105-100 for operation, are relevant. Commercial installers are bound by DGUV; for private individuals, this is less formal, but that does not change the duty of care to work professionally.
What You Can and Cannot Do Yourself
Clear boundaries ensure safety:
Tasks you can do yourself (carefully and without interfering with the electrical system):
- Planning the installation locations and cable routes
- Drilling the external feed-through and sealing it
- Installing cable ducts and conduit
- Fitting socket frames and blank covers
Tasks reserved for a qualified electrician:
- Connecting to the distribution board, installing RCDs and circuit breakers
- Establishing the protective conductor connection and the power input
- Initial inspection according to DIN VDE 0100-600 (inspection before commissioning)
- Documentation of the system
The boundary is where the system is energized or the protective measures become effective. Anyone who carries out these tasks themselves risks their health and life and may lose insurance coverage in the event of damage.
Inspections and Documentation
After installation, an initial inspection by a qualified electrician is required. According to DIN VDE 0100-600, this includes, among other things:
- Visual inspection of the system
- Testing of the protective conductor connections and insulation resistance
- Functional testing of the RCD and circuit breakers
- Measurement of the RCD's tripping current and tripping time
The inspection is documented with a test report. Keep this report together with the circuit diagram in the vehicle; it is valuable in the event of damage, for the insurance company, and when selling the caravan.
For ongoing operation, a periodic inspection based on VDE 0105-100 is recommended. A typical interval for leisure vehicles is every two to four years, depending on use and location (shorter for permanent campers at a campsite with frequent connection changes, longer for occasional campers).
Many insurers require proof of professional installation in the event of damage. Without a test report and circuit diagram, settlement can be difficult in the event of a dispute. Therefore, document all components with the manufacturer, type, and installation location; this also makes troubleshooting easier later.
Frequently Asked Questions
How does the 230-V supply differ from the 12-V system in a caravan?
The 12-V onboard electrical system powers small appliances such as LED lights, water pumps, and fans. The 230-V power supply enables the operation of the refrigerator, heater, air conditioner, and other household appliances. 230-V power is provided via shore power or an inverter and requires more extensive safety devices, such as RCDs and circuit breakers.
What components are needed for a 230-V system in a caravan?
The basic components are: a CEE power input socket (shore power), a distribution box with circuit breakers and an RCD, power cables (H07RN-F) in appropriate cross-sections (usually 2.5 or 4 mm²), 230-V Schuko sockets, changeover relays (when using both shore power and an inverter), and optionally an inverter for independent power supply from the onboard battery.
Does a retrofitted 230-V system in a caravan need an RCD?
Yes, a residual current circuit breaker (RCD) is mandatory in a modern 230-V installation and protects against dangerous electric shocks. For shore power systems, a 30 mA RCD is recommended directly after the CEE power input socket. This protective device is not optional—it is a safety requirement and can save lives.
How is a 230-V power input in a caravan protected?
Protection is provided by several components in series: The RCD (30 mA) protects against residual current. Circuit breakers (usually 16 A or 20 A) protect individual circuits. Each circuit should have its own circuit breaker—one for sockets, one for the heater, and one for the refrigerator. Power cables with appropriate cross-sections (2.5 or 4 mm²) prevent overheating.