












 About us
 Magazine
 Contact



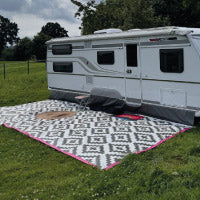
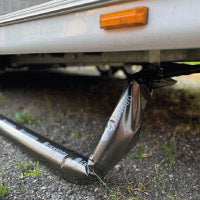
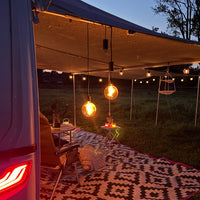


Why should you spend 8,500 euros on a professional paint job when you are often only 450 euros in material costs and a sunny weekend away from your individual dream look? Hand on heart, we all know that moment in spring when your gaze drifts over faded decals or the dated oak look in the interior and the desire for change is huge. The decision to visually transform your motorhome or caravan with high-quality vinyl wrap is the smartest way to give your faithful companion a modern design. At the same time, you protect the valuable original paint from stone chips and aggressive UV radiation without blowing your travel budget for the next three years.
Understandably, you want to ensure that the new look doesn't suddenly bubble or peel at the edges while parked in the shade at 38 degrees in southern Spain. We absolutely understand this concern, because in the end, only a result that truly lasts counts in a DIY project. In this guide, you will therefore learn exactly how to upgrade your motorhome with the right film, wrap interior furniture surfaces flawlessly yourself, and what you need to look for when choosing materials for the 2026 season. We will take you by the hand and show you step by step how to change the look of your camper while avoiding expensive mistakes during surface preparation.
Key Takeaways
- Learn how to visually upgrade your motorhome and interior with the right vinyl wrap without having to invest in expensive paint jobs or new furniture.
- Discover the secrets of material science and learn why cheap films fail in summer heat and what adhesive strength you really need for difficult surfaces.
- Use our DIY guide, including a tool checklist, to complete your project bubble-free and consistently avoid errors during pre-cleaning.
- Get inspired by 2026 trends like the "Nature Look" and find the perfect design that also visually reflects your sense of adventure.
- Receive valuable tips on long-term care so that your wrap design looks as good as new for a long time, even after many trips and washes.
Vinyl wrap for motorhomes and caravans: What is possible?
Do you know that feeling when you look at your camper and think: It's technically top-notch, but visually it’s stuck in 1995? A professional paint job often devours between 6,000 and 10,000 euros, which represents a real hurdle for many travel budgets. Modern motorhome vinyl wrap offers you a brilliant shortcut here. It is not only significantly cheaper than fresh paint, but it also turns your vehicle into a unique piece in just 3 to 5 days. We distinguish between car wrapping for the exterior and special furniture foils for the interior.
A decisive advantage is the protective factor. High-quality films protect the bodywork from fading due to aggressive UV radiation, which attacks the paint, especially in the sunny south. Since the wrapping is completely reversible, it is perfect for leased vehicles. You simply return the vehicle in its original condition after the contract ends. For private sales, well-maintained original paint under the wrap often increases the resale value by 12 to 18 percent, as stone chips and small scratches have been effectively prevented.
Professional full vehicle wrapping requires some skill, but the results are impressive. Compared to buying new furniture, you save massively on weight in the interior. While new cabinet doors made of real wood put unnecessary strain on your payload, the wrap for an entire kitchenette usually weighs less than 2 kilograms. That's real vanlife thinking: maximum style with minimal ballast for your payload reserves.
Exterior wrapping: From accents to full wraps
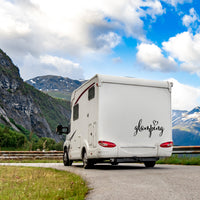
You don't have to wrap the entire vehicle right away. Targeted accents like sporty stripes or the popular compass motif are often enough to give the camper character. Paint protection films (PPF) are particularly important for alcove owners. These are significantly thicker than standard color films at approx. 150 to 200 micrometers and protect the exposed front from stone chips during fast highway journeys. A technical specialty is textured walls or hammered surfaces. Here we use special high-performance films that, thanks to a high elasticity of up to 150 percent, nestle perfectly into the depressions without causing unsightly bubbles.
Interior update: Furniture foils for a fresh breeze
Does the old rustic oak look ruin your holiday mood? With special interior films, you can transform dark caves into bright oases of well-being. The biggest plus point is that you work completely without sanding dust or chemical paint fumes. This is a blessing for your health, especially in the tight spaces of a van. The surfaces are extremely hygienic after wrapping and can be easily wiped down with standard cleaners, as the film forms a non-porous protective layer. From matte white to tactile wood textures with real 3D embossing, everything your camper heart desires is possible. This is how you create a modern atmosphere with the right motorhome vinyl wrap that fits your individual lifestyle exactly.
Choosing the right material: Which film lasts in a camper?
You are standing in front of your camper planning the big makeover. Before you grab the first offer you see, let's talk about the physics of a motorhome. A closed van heats up to over 60 degrees Celsius in the blazing sun of Southern Europe within 30 minutes. Cheap films from the hardware store, intended for static kitchen fronts in air-conditioned apartments, fail miserably here. The adhesive becomes soft, the plasticizers evaporate, and the film contracts at the edges. Professionals therefore rely on polymeric or cast vinyl films that have been specially developed for these thermal stresses.
The challenge in a camper is often the surfaces. Many plastic panels are made of polyethylene (PE) or polypropylene (PP). These materials have extremely low surface energy. This means that normal adhesive simply beads off. If you want to apply vinyl wrap to your motorhome, pay attention to the information on adhesive strength. For open-pored wood or rough plywood panels in the interior, you need an adhesion promoter, also known as a primer, so that the bond remains permanent. A good film for 2026 is characterized by a durability of 7 to 10 years and offers integrated UV protection that prevents colors from fading.
Air channel technology is crucial so that your work is not ruined by frustrating air bubbles. The adhesive on the back is not applied over the entire surface but has microscopically small channels. This allows you to easily squeegee trapped air out toward the edge. This makes installation feasible even for beginners, as long as the ambient temperature is between 15 and 25 degrees Celsius.
Furniture foil vs. vehicle wrap: The differences
Furniture foils for the interior are significantly more robust and tactile than exterior films with a thickness of 200 to 350 micrometers. They deceptively imitate wood structures or stone looks. In the kitchenette, they score points with high scratch resistance, which is essential for daily use. However, for the exterior shell of your camper, this stiffness is a disadvantage. Here you need a cast film (cast wrap). This is extremely stretchable and has no "memory effect." This means it doesn't want to return to its original shape when you stretch it into deep grooves or around round corners. Details on deformability and weather resistance can be found in the 3M Vehicle Graphics documentation, which is considered the gold standard for mobile applications.
Special case: Hammered and textured surfaces
If your motorhome has the classic hammered surface, applying a conventional motorhome vinyl wrap becomes difficult. The contact area for the adhesive is reduced by up to 40 percent due to the structure. The only thing that helps here is a special high-tack film with extremely high initial adhesion. These films are softer and nestle into every depression of the structure with the help of a heat gun. Be sure to perform an adhesion test on an inconspicuous spot beforehand. Clean the area with isopropanol and apply a 10x10 cm piece of film. If it is still rock solid after 72 hours, you can start the project. To ensure your freshly wrapped jewel stays just as perfectly organized on the inside, you can find practical storage systems with us that fit exactly into your new cabinets.
DIY guide: Wrapping your motorhome yourself without bubbles
Do you want to give your camper a new look? The motorhome wrapping project requires patience, but with the right plan, you save up to 2,500 euros compared to a professional workshop. The success of your endeavor is decided long before the first piece is glued. Meticulous cleaning is the absolute foundation. Dust particles or tiny grease films are immediately avenged by unsightly bumps under the surface that you cannot correct later. Use special silicone remover or isopropanol with a purity of 99.9 percent for preparation. Commercial glass cleaners are taboo, as they often contain sealing substances that reduce the adhesion of the adhesive layer by up to 40 percent.
To ensure you don't stall while working, have your equipment ready. Professionals never work without a structured tool list:
- High-quality vehicle wrap (be sure to choose cast film for 3D wrapping)
- Squeegee with a soft felt edge to prevent scratches
- Heat gun with a precise, digital temperature display
- Precision cutter with fresh 30-degree blades for clean cuts
- Infrared thermometer to check the surface temperature
- Strong magnet holders to fix the sheets to the sheet metal
Pay strict attention to the ambient temperature at your workplace. The ideal range for bubble-free application is between 18 and 23 degrees Celsius. If the temperature drops below 12 degrees, the film becomes brittle and breaks when stretched. At over 30 degrees, the material becomes too soft and the adhesive grabs extremely strongly immediately. This leads to uncontrollable wrinkles and frustration. Therefore, plan your project for a mild day in May or use an air-conditioned hall to create optimal conditions.
Step by step to the perfect surface
Start with a generous cut of your motorhome wrap. Plan a buffer of at least 5 centimeters on each side. Nothing is more annoying than a sheet that ends up being a few millimeters too short at the end of the area. The golden rule when squeegeeing is: always work from the center outwards in a star pattern. Hold the squeegee consistently at a 45-degree angle to the surface. This way, you effectively push the air in front of you. If a bubble does form, carefully peel the film back a bit instead of piercing the air pocket with a needle.
Master class: Corners, edges, and curves
At curves and grooves, the wheat is separated from the chaff. Heat makes the material supple, but caution is required. Heat the film to a maximum of 80 degrees Celsius. Too much heat will destroy the color pigments or make the film shiny where it should actually be matte. In deep depressions, make targeted relief cuts to avoid later stress cracks. For overlaps in the exterior area, you should maintain an edge of exactly 2 millimeters. This offers the wind no attack surface at 100 km/h and prevents the ingress of moisture.
The most important conclusion is what is known as "post-heating" or tempering. All edges and heavily stretched areas must be heated to about 90 to 100 degrees after application. This chemical process releases the memory effect of the film. It forgets its original flat shape and remains permanently in the new contour of the camper. Without this crucial step, the edges would peel off and curl up unattractively after the first hot summer day with 35 degrees outside temperature.

Design inspirations: Trends for campers 2026
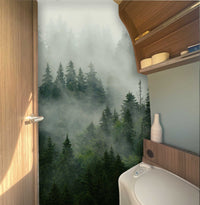
The world of mobile travel is changing radically in 2026, moving away from the sterile standard look toward true individuality. We see a strong trend toward the "Nature Look," dominated by muted earth tones like sage green, terracotta, and deep slate gray. Current market analyses show that 68 percent of van lifers prefer organic motifs that visually blend the camper with its surroundings. Forest motifs and leaf structures are no longer applied as colorful stickers, but as large-scale, matte textures. High-quality motorhome vinyl wrap in these shades ensures that your vehicle becomes almost invisible on a forest pitch while simultaneously looking classy.
Mountain graphics remain the undisputed classic but are being reinterpreted in a modern way. Instead of simple jagged silhouettes, designers in 2026 are using topographic lines. These fine contour lines recreate real mountain ranges and look significantly more mature due to their minimalist lines. These graphics are often chosen in shades only slightly darker than the base color of the vehicle, creating a subtle tone-on-tone effect.
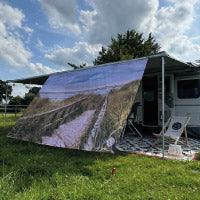
In the interior, the glossy plastic look of the 2010s is disappearing completely. The trend is toward super-matte surfaces that have an anti-fingerprint coating. Particularly exciting is the combination with real-wood haptic films. These modern materials feel like real, grained wood when touched. You can use them to transform old cabinet fronts into a Scandinavian oasis of well-being in less than two hours. Those who like it even more personal can have their own photos or the GPS data of their last Scandinavian tour printed directly onto the motorhome vinyl wrap. This turns the rear door into a canvas for your own travel history.
Exterior decors: Setting accents
Small details determine the overall effect. Compass roses and world maps remain popular but are often implemented in 2026 only as fine outline graphics. When choosing colors, physics plays a major role. Dark surfaces heat up to 85 degrees Celsius in direct sunlight. Light silver or beige tones, on the other hand, reflect up to 72 percent of the radiation, which noticeably lowers the interior temperature. For the final finish, it is best to combine the wrapping with our robust Campidoo stickers, which bring your personal statement directly onto the bodywork.
Kitchen makeover in the caravan
The kitchen is the heart of your camper and can be visually upgraded with little effort. A splashback in a tile look, for example, in the trendy metro style or as a Moroccan mosaic, changes the entire atmosphere in the room. Even the often boring refrigerator front can be used as a design element by wrapping it in a contrasting color. However, caution is advised with countertops. A normal film cannot withstand the mechanical stress of pots and knives in the long term. Here, you should rely on special high-performance films with a thickness of at least 250 microns, which can easily handle short-term heat up to 95 degrees Celsius.
Care and longevity: How the film stays beautiful
A high-quality motorhome vinyl wrap is an investment in the appearance and value retention of your vehicle. To ensure the design still looks like new even after years, proper care is crucial. Aggressive cleaners are the sure death of every wrap. Agents with a pH value below 3 or above 10 chemically attack the surface. They extract the plasticizers from the material, which makes the film brittle and leads to unsightly cracks. Instead, use mild, pH-neutral shampoos that gently clean the plastic without attacking the protective layer.
When it comes to the question of car wash vs. hand wash, true enthusiasts always choose hand washing. Modern portal car washes with soft polyethylene brushes are usually harmless, but the risk of micro-scratches remains. If you do use a car wash, be sure to select a program without hot wax. Wax residues are difficult to remove from many types of film and create spotty shiny areas on matte surfaces. When using a pressure washer, you must be particularly careful:
- Maintain a minimum distance of 50 centimeters from the surface.
- Never aim the water jet directly at the film edges to prevent detachment.
- Always spray at a 90-degree angle to the surface.
- Use a maximum water temperature of 60 degrees Celsius.
Small damage from stone chips or deep scratches is hard to avoid in everyday camper life. Many modern films have a so-called memory effect. Light surface scratches often disappear on their own if you carefully heat the area with a hair dryer. For larger dings, a neatly cut patch from a leftover piece of your original film helps. If you want to remove the wrap after 7 or 10 years, this can be done without residue through targeted heat application. Warm the motorhome film over a large area to about 50 degrees Celsius and peel it off slowly at a shallow angle. Any remaining adhesive can be removed with a special isopropanol cleaner or a mild orange oil extract.
The right care for wrapped surfaces
Matte and glossy surfaces have different requirements for sealing. While glossy films benefit from a UV-protection wax, matte variants require special spray sealants that do not create any shine. A critical topic is "sunburn" on the roof. Dark films can heat up to over 80 degrees Celsius in the blazing sun. This enormous heat massively accelerates the aging process of the polymers. We therefore recommend choosing lighter tones for roof areas or regularly maintaining the surfaces with Campidoo cleaning agents, which are precisely tailored to these extreme thermal stresses in van life.
Conclusion: Your path to the dream camper with Campidoo
The courage to customize is rewarded as soon as you open the door to your freshly wrapped camper for the first time. Whether you add accents on the exterior or give the cabinets in the interior new decors, the change is immediately noticeable. The great advantage of Campidoo lies in its practical relevance. We are constantly on the road ourselves and know exactly which films withstand the harsh conditions between salty sea air and dusty gravel roads. Our products are developed by campers for campers, which gives you the security of not having to compromise on quality. Transform your vehicle now into a real one-of-a-kind that reflects your personality.
Start your camper makeover for the 2026 season now
You now have all the tools and tips ready to give your vehicle a completely new look. The trends for 2026 clearly show that over 85% of van lifers opt for matte surfaces and natural wood looks to create a cozy atmosphere. With the right choice of material, you ensure a durability of at least 7 years, even if the sun is beating down continuously in the south. Thanks to the innovative air-channel technology, you save 100% of the frustration when applying, as annoying bubbles no longer have a chance. A high-quality motorhome film also protects your valuable original paint, which measurably increases the resale value of your vehicle. At Campidoo, we know exactly what matters because we spend every free minute on the road ourselves. Our products are developed by campers for campers and offer you weather-resistant professional quality for your next project. There is no better feeling than opening the door to the freshly wrapped interior for the first time. Grab your squeegee and just get started. See you out on the road!
Get your furniture film for your next DIY project now!
Frequently asked questions about motorhome wrapping
How long does a wrap on a motorhome last on average?
A high-quality film for your motorhome lasts between 5 and 10 years with good care. While vertical surfaces often shine for the full 10 years, durability on horizontal roofs is reduced to about 4 to 6 years due to direct UV exposure. Premium manufacturers often provide a 7-year warranty for their cast films in outdoor use. If you clean your vehicle regularly by hand, you extend its lifespan by a good 20 percent.
Can film be applied to hammer-finish walls on a caravan?
Wrapping hammer-finish surfaces is technically difficult and leads to unsightly results in 95 percent of cases. Since the film only sticks to the ridges of the texture, tiny cavities form underneath where moisture collects. Only special high-tack films with extremely high adhesive strength hold on these uneven surfaces for a certain time. Most professionals refuse such jobs, as adhesion to the 2-millimeter-deep dents cannot be permanently guaranteed.
What does it cost to wrap a motorhome yourself compared to a professional?
By doing it yourself, you save up to 75 percent of the costs, as labor time is the largest item for a professional. For high-quality material, you pay about 600 to 1,200 euros for DIY, while a professional full wrap costs between 3,500 and 5,500 euros. A motorhome film installation in your home garage requires 30 to 40 working hours, but saves your travel budget massively. When buying, ensure you plan for 10 to 15 percent wastage.
Is furniture film in a caravan heat-resistant enough for the summer?
Special furniture films easily withstand temperatures of up to 80 degrees Celsius without detaching. Since the interior of your camper can heat up to 70 degrees at an outside temperature of 32 degrees, this heat resistance is absolutely necessary. When buying, look for polymeric calendered films that were developed specifically for interior finishing. These films shrink by less than 0.5 millimeters at the edges even after 5 years of intensive summer use.
Can I take a wrapped motorhome through a car wash?
You can safely use a textile car wash after a waiting period of exactly 14 days. However, avoid programs with hot wax at all costs, as the chemical additives pull the plasticizers out of the film and can make it brittle after about 12 months. If you use a high-pressure cleaner, maintain a minimum distance of 40 centimeters from the film edges. A water pressure of over 80 bar can otherwise lift the edges and permanently destroy the adhesive bond.
How do I remove old stickers and film residues from the paint?
Heat the old film with a heat gun to exactly 50 to 60 degrees Celsius so that the adhesive becomes soft. In this temperature range, the material can usually be peeled off in one piece without damaging the original paint. If adhesive residues remain, a special isopropanol cleaner with a concentration of 70 percent or an orange oil cleaner will help. After a reaction time of 120 seconds, you can simply wipe the residues away with a microfiber cloth.
Which tool is indispensable for beginners when wrapping?
For a clean result, you need a 5-piece basic set that you can get for about 30 euros. Indispensable are a felt squeegee for bubble-free application, a cutter knife with 30-degree snap-off blades, and a digital heat gun for fixing. An infrared thermometer helps you to control the post-heating temperature of 90 degrees precisely. With a special magnet holder set, you can securely fix the motorhome film parts to the vehicle before you remove the backing paper.
Does the film fade due to strong sunlight in the south?
Modern high-performance films have integrated UV protection that prevents fading for at least 5 years. In regions with a UV index of 9 or higher, such as in southern Spain or Morocco, the material ages about 20 percent faster than in Northern Europe. Dark colors like black or anthracite absorb more energy and can heat up to 90 degrees. For trips to the south, choose lighter tones or metallic films, as these reflect the sun's rays better.

